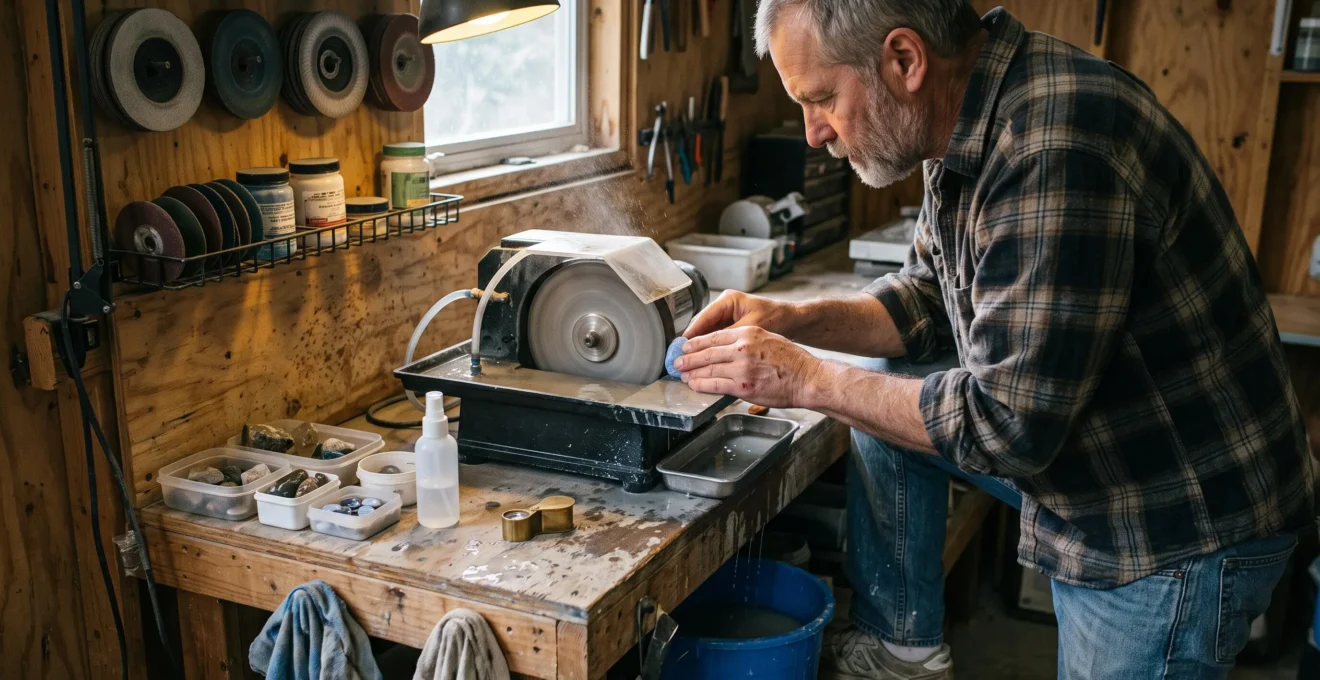
Starting lapidary at home does not require a workshop full of expensive machines. It requires a suitable material, a controlled way to shape or finish it, and enough patience to recognise when a stone is ready for the next abrasive stage. Buying equipment before learning those decisions is one of the easiest ways to waste money.
For beginners working in a shed, garage or limited spare-room space, the sensible starting point is often a rock tumbler, supervised access to a club workshop, or a versatile wet flat lap. The right choice depends on whether the aim is polished pebbles, domed cabochons or precisely faceted gemstones.
Safety must shape that decision from the beginning. Cutting quartz-rich stones can generate hazardous respirable crystalline silica, while water, slurry, electricity and rotating equipment introduce additional workshop risks. A small space is only suitable if those hazards can be properly controlled.
The goal is to spend on skills and reliable results first, then buy specialised equipment when a specific limitation justifies it.
Starting home lapidary without expensive mistakes
- Choose tumbling, cabbing or faceting according to the stones you actually want to make, rather than the machines advertised to beginners.
- Practise on inexpensive, inspected material and measure avoidable damage separately from normal material removal.
- Establish wet dust suppression, safe electrical arrangements and controlled slurry disposal before operating cutting or grinding equipment.
- Why Do Beginners Waste Rough in the First Month of Lapidary (and How Much Is Normal)?
- How to Build a Minimal Lapidary Workflow in 5 Steps for a Small Shed or Spare Room
- Cabbing Machine vs. Entry-Level Faceting: Which Gets Better Results in Your First 90 Days?
- The Safety Mistake That Puts Silica Dust Into Your Home Air Even With ‘Good Ventilation’
- In What Order Should You Learn Sawing, Grinding, Prepolish, and Polish to Avoid Plateaus?
- How to Tumble Stones Without Over-Rounding Edges Using a 3-Stage Cycle Plan
- How to Vet a ‘Frequency’ Claim Using 5 Credibility Questions Before You Spend Money
- Why Do Tumbled Stones Look ‘Perfect’ Until You Cut Them—and What Can You Check First?
Why Do Beginners Waste Rough in the First Month of Lapidary (and How Much Is Normal)?
Beginners lose rough mainly through excessive shaping, overlooked fractures and removing too much material before establishing the final stone’s proportions. Some weight loss is unavoidable because cutting and grinding physically remove material. There is no reliable universal percentage for first-month waste: the amount depends on the mineral, its condition, the intended shape and the operator’s decisions.
The often-repeated suggestion that beginners waste 40% of their rough should therefore be treated as an unverified rule of thumb, not a performance benchmark. A fractured opal and a sound piece of jasper behave differently under abrasive pressure, and even two pieces of the same mineral may yield very different results.
Three avoidable mistakes deserve particular attention:
- Over-grinding: repeatedly changing the intended outline removes material that could have remained in the finished stone. Mark a realistic shape before grinding and stop refining once its proportions are satisfactory.
- Thinning the girdle too early: creating a fragile edge before checking cracks and establishing the dome can leave a cabochon vulnerable to chipping. Preserve sufficient edge thickness until the main shape is stable.
- Sawing without inspection: a cut through an inclusion, fracture or unexpected boundary may divide useful material into unsuitable pieces. Examine the rough, mark suspected flaws and choose a cutting orientation deliberately.
Separate normal processing loss from avoidable damage. Saw kerf, grinding allowance and removal of unwanted matrix can be necessary to produce a sound gemstone. A stone broken by excessive pressure, however, represents a different learning problem.
A simple ten-stone record is more informative than a generic waste percentage. Weigh each piece before processing and after finishing, photograph its condition and note whether the removed material was intentional. The overall mass-loss percentage is calculated as the combined starting mass minus combined finished mass, divided by combined starting mass, multiplied by 100. That figure measures total removal, not automatically waste.
For a hypothetical batch starting at 200 g and finishing at 130 g, total material loss is 35%. Whether that result is acceptable cannot be judged without considering the material, design and reasons for removal.
Inexpensive agate and jasper rough can provide useful practice, particularly when pieces are reasonably sound and suitable for the equipment. Both are quartz-rich, however, so cheap material must never mean relaxed silica controls.
Once avoidable losses become recognisable, the next investment should address a real workflow problem rather than an imagined equipment shortage.
How to Build a Minimal Lapidary Workflow in 5 Steps for a Small Shed or Spare Room
A minimal home lapidary workflow has five stages: inspect and mark the rough, trim it if necessary, grind the preform, refine the surface with progressively finer abrasives, and polish. A compact wet flat lap can perform several of these operations, while sawing may be better handled through a lapidary club. The workspace must accommodate water, electricity, cleaning and safe material handling.
The practical layout matters more than the number of tools. Keep the inspection area clean and dry, position wet machinery on a stable splash-resistant workbench, and provide a dedicated place to collect used water and mineral slurry.
In a small shed, the five stages can be organised as follows:
- Inspect and mark: use a clean, well-lit portion of the bench for a hand lens, pencil, ruler and rough inspection. Allow enough space to turn each stone and mark its intended orientation.
- Trim: use an appropriately guarded, water-fed lapidary saw if available and suitable. Otherwise, arrange supervised cutting at a club rather than buying a saw immediately.
- Grind and preform: shape the material using an appropriate wet abrasive surface, controlling pressure and preserving the planned outline.
- Sand and prepolish: change to progressively finer abrasives, cleaning the stone and work area between stages to avoid coarse-grit contamination.
- Polish: use a compatible polishing surface and compound, then inspect the dry stone under strong lighting for scratches or remaining damage.
A flat lap can be versatile because different compatible abrasive discs may support grinding, refinement and polishing on one machine. It does not automatically replace a trim saw, and not every flat lap is suitable for every material or cabochon shape.
Before buying, check the machine’s wet-working capability, guarding, compatible consumables, operating speed, maintenance requirements and electrical specifications. Use a properly protected electrical supply, including suitable residual-current protection, and keep connections outside the splash zone.
Provide a stable bench with room for the machine, water containment and safe hand movement. The actual footprint must follow the equipment manufacturer’s clearances, not an arbitrary measurement. Do not discharge abrasive slurry into household plumbing.
A spare room shared with living or sleeping activities is generally a poor choice for silica-bearing cutting and grinding. If effective containment and cleaning cannot be maintained, use a dedicated workshop or club facility instead.
Your five-point pre-purchase workshop check
- Draw the five workflow stages on a bench layout and produce a sketch showing where inspection, wet processing and cleaning will happen.
- Choose one intended stone type and finished shape, then write down which operations the proposed machine can genuinely perform.
- Check the manufacturer’s electrical, water-feed, guarding and maintenance requirements, and save the relevant specification sheet.
- Document a practical splash-containment, wet-cleaning and slurry-collection arrangement before starting any abrasive work.
- Check consumable availability, repair options and second-hand resale prospects, then create a short buy-or-borrow decision record.
Apply a simple regret-proof purchase test: does the machine serve at least two operations you genuinely need, work with your intended material, and retain reasonable resale prospects? These are useful screening criteria, not a guarantee against depreciation.
A compact, safe arrangement with borrowed specialist tools can offer a better learning environment than an expensive workshop assembled before its owner knows which lapidary discipline to pursue.
Cabbing Machine vs. Entry-Level Faceting: Which Gets Better Results in Your First 90 Days?
Cabbing is generally the more accessible route for beginners who want recognisable finished stones within their first 90 days, because shaping a rounded dome allows more flexibility than meeting precisely aligned facets. Entry-level faceting suits learners who specifically want geometric gemstones and enjoy measurement-intensive work. Neither route guarantees finished results within a particular timeframe.
The International Gem Society’s introduction to lapidary arts distinguishes tumbling, cabbing, faceting and carving as separate disciplines. Cabochons have curved or domed tops, commonly with flat backs, while faceted stones use deliberately arranged flat surfaces.
For a first three-month learning period, the differences are practical rather than purely aesthetic.
| Decision factor | Cabochon cutting | Entry-level faceting |
|---|---|---|
| Typical finished result | Domed, polished stones | Geometrically faceted gems |
| Primary early skill | Shape, symmetry and surface refinement | Angle control, alignment and facet meets |
| Equipment priorities | Wet grinding, sanding and polishing surfaces | Accurate faceting machine, laps and transfer equipment |
| Likely beginner difficulty | Maintaining an even dome and clean polish | Maintaining precise geometry through multiple stages |
| Best initial motivation | Enjoying shaping and tactile finishing | Enjoying precise, repeatable measurements |
| Space considerations | Wet grinding and splash containment | Stable precision workstation and controlled wet processing |
During the first month, a cabbing learner might focus on one repeatable dome shape using inexpensive rough. In the following weeks, the emphasis can move towards consistent girdles, scratch removal and polishing. A faceting learner may spend that period learning machine alignment, dopping, cutting angles and transferring a stone accurately.
Those are suggested learning priorities, not measured 90-day outcomes. Individual progress depends heavily on instruction, practice time, equipment condition and the material selected.
The hidden budget also differs. Cabbing requires replacement abrasives, polishing compounds and potentially dop supplies. Faceting adds precision laps, suitable polishing media, dop sticks, transfer fixtures and maintenance of alignment-critical components. Comparing only machine prices misses these continuing costs.
Some skills transfer between the disciplines: identifying inclusions, orienting rough, understanding hardness and recognising abrasive damage. Accurate facet meets, indexing and transfer alignment require additional training.
Choose cabbing if the main pleasure is shaping patterned stones and achieving smooth surfaces. Choose faceting if controlled geometry is the attraction and repeated precision adjustments feel rewarding. When uncertain, trying both at a club is more informative than buying either machine unseen.
Whichever discipline wins, the next priority is controlling the hazards generated by its cutting and abrasive processes.
The Safety Mistake That Puts Silica Dust Into Your Home Air Even With ‘Good Ventilation’
The critical mistake is allowing silica-containing grinding slurry, splashes or residues to dry and then disturbing them during cleaning. Wet cutting suppresses dust at the point of contact, but it does not make contaminated surfaces harmless afterwards. General room ventilation cannot substitute for effective dust prevention, appropriate extraction, wet housekeeping and separation from living areas.
Quartz, agate and jasper can contain crystalline silica. Cutting, grinding or disturbing dry residues from these materials may release respirable particles small enough to reach deep into the lungs. Exposure can cause serious occupational lung disease, including silicosis.
Not every stone contains the same amount or form of silica. Some softer materials have different mineral compositions, but that does not make their dust automatically harmless. Material identification and the nature of the operation matter.
The NIOSH safe work practices for crystalline silica recommend water-based dust suppression for stone cutting, local exhaust ventilation where dust is generated, and avoiding dry sweeping and compressed-air cleaning.
These recommendations concern occupational environments rather than a tested safety guarantee for domestic lapidary workshops. Nevertheless, the prevention principles are directly relevant when assessing a home setup.
A practical workshop protocol begins before the machine is switched on:
- Identify the material and check whether the planned operation can generate hazardous mineral dust.
- Use equipment designed for wet cutting or grinding, with an effective water feed and splash containment.
- Prevent contaminated liquid from reaching clean storage areas, clothing and household surfaces.
- Collect slurry while it remains wet, using suitable containers and wet-cleaning methods.
- Avoid dry sweeping, compressed air and ordinary household vacuum cleaners for potentially silica-contaminated residues.
- Keep collected waste contained and follow applicable local disposal requirements rather than washing mineral slurry into household drains.
The US OSHA respirable crystalline silica regulation restricts dry sweeping and dry brushing in covered construction workplaces where those activities could contribute to exposure, subject to specified exceptions. Its occupational exposure limits and legal obligations are not universal domestic-workshop standards.
Respiratory protection is a backup within a wider control system, not permission to create uncontrolled dust. Appropriate filter selection, facepiece fit and the actual exposure conditions all matter. A poorly fitting respirator can provide much less protection than expected.
For any proposed dry trimming, grinding or cleanup operation involving silica-bearing material, do not assume an open window and a disposable mask make the activity safe. Obtain competent guidance and suitable controls, or move the work to an appropriately equipped facility.
Once the workshop can be operated and cleaned safely, progress depends less on buying accessories and more on mastering the sequence of abrasive work.
In What Order Should You Learn Sawing, Grinding, Prepolish, and Polish to Avoid Plateaus?
Learn to inspect and orient rough first, then practise basic sawing, preforming, progressively finer grinding, prepolishing and final polishing. Each stage should produce a verifiable improvement before the next begins. Most persistent polishing problems cannot be solved simply by adding more compound: deeper scratches, poor shaping or abrasive contamination usually need attention earlier in the sequence.
The key principle is progressive scratch removal. Coarse abrasives shape the stone but leave relatively deep surface damage. Finer abrasives must remove that damage before polishing can produce a clean finish.
Start with inspection and cutting orientation. On scrap material, practise identifying a useful face and marking a cutting line. If sawing equipment is unavailable, begin with safely prepared blanks rather than improvising with unsuitable cutting tools.
Next, practise maintaining a consistent preform. A cabochon should develop a controlled outline and dome without repeatedly correcting the same uneven area. A sound preform makes every subsequent stage easier.
During sanding and prepolishing, inspect the entire surface under strong directional light. Change the viewing angle to reveal scratches that disappear under ordinary overhead lighting. Do not advance merely because the stone feels smooth.
When a scratch survives into the polishing stage, use this diagnostic order:
- Clean and dry the stone, then inspect it under a strong light to identify the scratch pattern.
- Determine whether the marks resemble damage left by an earlier, coarser abrasive stage.
- Inspect the current disc, lap, polishing surface and handling tools for contamination or embedded particles.
- Return to an appropriate earlier abrasive stage if the damage cannot be removed at the current one.
- Clean thoroughly and repeat the refinement process, verifying the surface before advancing.
Cross-contamination is particularly frustrating because a single coarse particle can damage an otherwise well-refined surface. Separate abrasive supplies and clean stones, hands, equipment and work areas when changing stages.
Use measurable practice drills rather than relying on impressions. Saw a flat face on inexpensive scrap under suitable supervision. Shape two comparable cabochon blanks to consistent outlines. Produce an even prepolish on one stone and inspect it before applying final polish.
Keep a photograph after each stage. Comparing images can show whether a scratch originated during shaping or appeared later through contamination.
For beginners who are not yet ready to saw or preform stones, tumbling provides a less equipment-intensive introduction to abrasive progression.
How to Tumble Stones Without Over-Rounding Edges Using a 3-Stage Cycle Plan
To reduce unwanted edge rounding during rock tumbling, limit coarse shaping to the amount actually needed, group stones of compatible hardness, and inspect their shape before moving to finer abrasives. A three-stage planning framework can help, but successful rotary tumbling often requires four distinct abrasive operations. Stage duration must follow the stones’ condition and the machine’s instructions, not a universal timetable.
Rotary tumbling works through repeated contact between stones, abrasive media and the barrel environment. The coarse stage removes projections and changes outlines. Continuing it after the desired shape is reached can progressively round edges that the operator wanted to preserve.
For planning purposes, group the process into three goals:
| Goal | Practical action | Checkpoint |
|---|---|---|
| 1. Shaping | Use the appropriate coarse abrasive stage only as needed. | Unwanted projections are reduced without excessive loss of the intended outline. |
| 2. Smoothing | Complete the necessary medium and fine or prepolish operations. | Earlier scratches and rough patches are no longer visible under suitable inspection. |
| 3. Polishing | Use a compatible polish in a thoroughly cleaned barrel. | The surface develops the intended finish without obvious remaining abrasive damage. |
This is a three-goal framework, not a universal three-abrasive recipe. Many rotary tumbling procedures distinguish coarse grinding, medium grinding, fine grinding or prepolish, and polishing as four separate stages. Combining or skipping abrasives without a material-specific process can compromise the finish.
Detailed RockTumbler.com rotary tumbling instructions describe that four-stage progression and emphasise hardness compatibility, cleaning between stages and keeping rock mud out of drains.
Sort stones before loading the barrel. Harder pieces can abrade softer pieces more aggressively, while porous or fractured material may break apart or retain unwanted abrasive particles. Use the barrel fill level and media specified for the actual machine.
Inspect stones at suitable intervals, following the manufacturer’s operating instructions. Stop shaping when the intended outline is sufficiently developed rather than extending the coarse cycle merely to reach an arbitrary number of days.
Rotary tumbling naturally rounds exposed edges. If the goal is to retain sharply defined facets or angular outlines, tumbling may be the wrong finishing method regardless of the cycle used.
Tumbling is a useful low-commitment way to learn material sorting, abrasive progression and patience. It does not teach accurate sawing, cabochon preforming, dopping or facet alignment.
Once basic finishing skills are established, material buying decisions become the next opportunity to protect a limited hobby budget.
How to Vet a ‘Frequency’ Claim Using 5 Credibility Questions Before You Spend Money
When a gemstone seller advertises a special vibration or frequency, evaluate the claim separately from the stone’s identifiable mineral properties. A numerical or scientific-sounding description does not establish a measurable therapeutic or energetic benefit. Before paying a premium, check whether the claim is testable, independently supported and relevant to the stone’s actual quality or suitability for lapidary work.
In the mineral and crystal market, the word “frequency” may refer to purported energetic, spiritual or vibrational properties. These claims should not be confused with established physical measurements such as hardness, density or optical characteristics.
For a beginner buying rough, the practical issue is opportunity cost. Money spent on an unsupported marketing premium is money unavailable for suitable practice material, replacement abrasives or supervised instruction.
Use five questions to assess the offer:
- Who benefits financially? Is the person making the claim also selling the stone, a treatment or an accompanying service?
- Can the claim be tested? Does the seller define what the frequency means, how it is measured and what observation could disprove the assertion?
- What explains the price premium? Is the additional cost linked to verifiable mineral quality, rarity, preparation or provenance, or only to the advertised energetic property?
- Is the evidence checkable? Are identifiable studies, measurements or independent assessments provided, rather than anonymous testimonials or unsupported statements?
- How accountable is the seller? Are the material description, treatment disclosures, returns policy and supporting evidence clear enough to assess before purchase?
Verifiable buying attributes include the mineral species, visible condition, disclosed treatments and, where substantiated, geographic origin. Hardness can guide the choice of abrasives and whether different stones should be processed together.
Personal or cultural meanings attached to gemstones are a separate matter. Someone may value a stone for symbolic reasons without needing to establish that its claimed effects have been scientifically demonstrated.
For lapidary purchasing, assess whether the material is sound, suitable for the intended technique and reasonably priced for its likely usable yield. A beautiful but heavily fractured stone can be a poor cutting purchase even without an exaggerated marketing claim.
The same evidence-first approach is valuable when examining polished stones that look flawless on the outside but may conceal unsuitable cutting material.
Key takeaways before buying or cutting your next stone
- A polished surface shows finishing quality, not necessarily the condition of the material beneath it.
- Compare stones by likely usable cutting yield, not simply by their appearance or individual purchase price.
- Inspect, record and learn from unexpected flaws before committing more valuable material to the saw.
Why Do Tumbled Stones Look ‘Perfect’ Until You Cut Them—and What Can You Check First?
Tumbled stones can look flawless because polishing improves the exposed surface without proving that the interior is free from fractures, cavities or inclusions. Cutting reveals fresh material and may expose flaws that were invisible from the outside. Before sawing, inspect the stone under strong light, examine surface defects and assess whether the expected usable interior justifies the cost and risk.
Tumbling removes or smooths the weathered outer surface of a stone. That can produce an attractive finish while leaving internal fractures, mineral boundaries or colour zoning untouched.
Some flaws become visible only when a fresh face is exposed. Others can be anticipated through careful inspection, although no simple home test can guarantee that the entire interior is sound.
Begin with a clean, dry stone and examine it under directional lighting. Look for fine lines, pits, cavities and changes in colour or texture. Then wet the surface to preview how it may appear when polished, recognising that wetting does not reveal every hidden defect.
Backlighting can be particularly useful for translucent stones. Place a suitable bright inspection light behind the material and look for discontinuities, cloudy zones or visible internal boundaries. Opaque stones will reveal much less through this method.
Weight and sound may provide supplementary observations when compared with similar known materials, but neither is a dependable standalone test for hidden fractures. Avoid striking valuable or fragile stones merely to judge their sound.
When buying tumbled material for cutting, calculate the likely cost per usable finished stone rather than relying on the price of each polished pebble. A cheap stone with little usable interior can be more expensive in practice than a sound piece of purpose-selected rough.
For example, in a hypothetical comparison, one purchase might produce two usable cabochons while another produces none because of hidden fractures. The meaningful comparison is the total material cost divided by the number of acceptable finished stones, with the limitations of a small sample clearly recognised.
If the first cut reveals an unexpected flaw, photograph the exposed face and compare it with the original inspection notes. Was the fracture already visible under backlighting? Did surface pitting indicate a possible cavity? Or was the defect genuinely concealed?
Record the answer without automatically treating the stone as a failure. The result can improve future selection, cutting orientation and decisions about which material is worth purchasing.
For the next practice session, choose one inexpensive stone, inspect and photograph it carefully, and make only the cut or finishing operation your equipment and safety arrangements can support. Compare the result with your original assessment before spending more.
Can you start lapidary without owning a stone-cutting machine?
Yes. A rock tumbler allows beginners to practise sorting materials and progressing through abrasives without sawing. Lapidary clubs may also provide supervised access to specialist equipment. Pre-cut blanks offer another way to begin learning surface refinement without purchasing a saw.
Is a garden shed safer than a spare bedroom for lapidary work?
A dedicated shed may offer better separation from household living areas, but it is not automatically safe. Suitable equipment, effective wet dust suppression, controlled cleaning, electrical protection, water containment and appropriate ventilation or extraction are still necessary. If these cannot be provided, use a properly equipped shared workshop instead.
Should a beginner buy a used lapidary machine?
Second-hand equipment may reduce initial spending, provided its condition can be verified. Check electrical safety, guarding, water-feed operation, bearing condition, vibration, availability of replacement parts and compatibility with current abrasives. An inexpensive machine requiring major repairs may cost more than a reliable alternative.
How can you tell whether a cabochon is ready for final polish?
Inspect the cleaned, dry surface under strong directional light. The prepolish should be consistent, without visible scratches remaining from earlier abrasive stages. If deeper marks persist, return to the appropriate refinement stage rather than expecting polishing compound to remove substantial damage.
Which stones are sensible for a beginner’s first practice pieces?
Inexpensive, reasonably sound agate or jasper can be useful for learning basic shaping and polishing, provided the tools are suitable for their hardness. Both are silica-bearing materials, so effective dust controls remain essential. Avoid beginning with expensive, heavily fractured or sentimental stones that leave little room for learning mistakes.