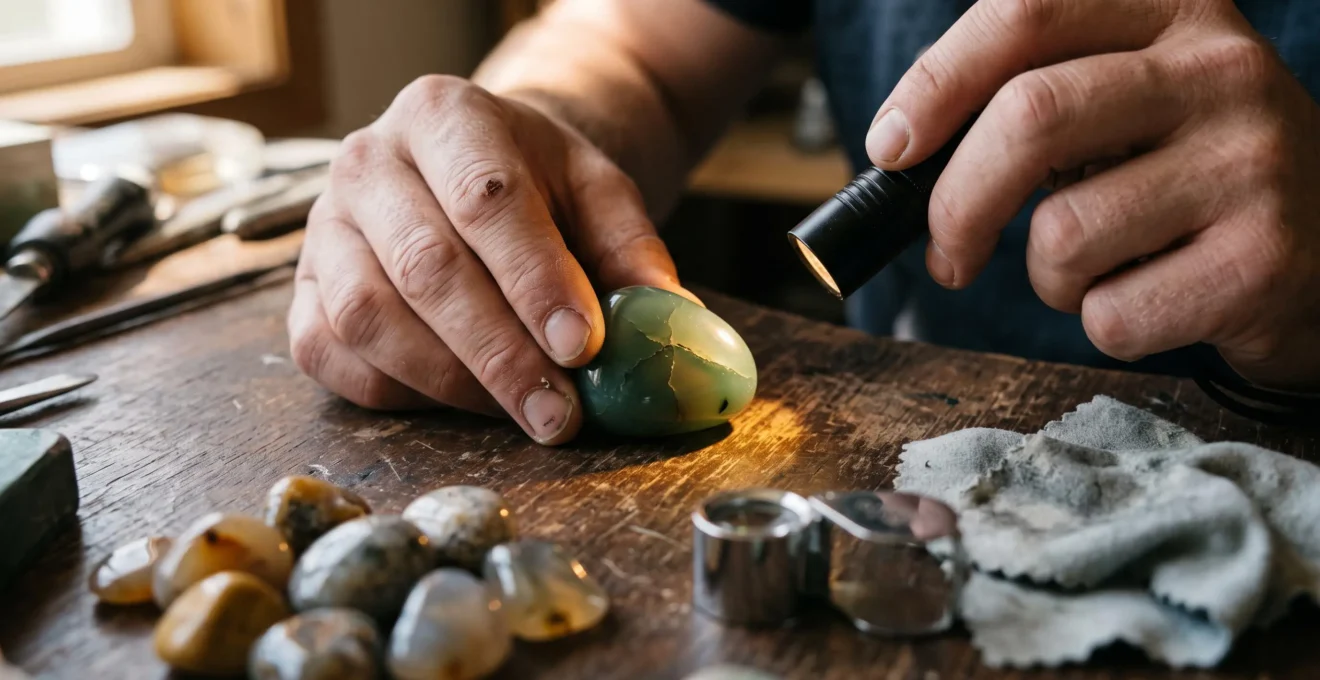
A polished tumbled stone can look flawless in a seller’s photograph yet reveal cloudy patches, fractures or disappointing colour when cut. The apparent contradiction comes from the difference between surface finish and internal quality. Tumbling smooths exposed surfaces; it does not repair fractures inside the material.
Curved surfaces also change how reflections move across a stone. Bright highlights can distract from fine defects, while a newly cut face reveals material that was never visible through the original exterior. Some stones have additional treatments that make fractures less noticeable.
For collectors, jewellery makers and lapidary hobbyists, the practical question is not whether a stone shines. It is whether that shine provides useful evidence about the material underneath. A torch, suitable lighting and a 10x loupe can help answer that question before cutting, drilling or accepting a purchase.
The following checks distinguish what can be assessed without damage from what remains uncertain until the stone is opened.
What to check before trusting a tumbled stone’s shine
- Inspect reflections and internal features separately. Use grazing light for surface defects and transmitted light for translucent material.
- Match tumbling methods to the material. Hardness differences, excessive grinding and contaminated abrasives can damage a finish.
- Make purchase decisions before cutting. Photograph suspected defects and complete non-destructive checks while returns remain possible.
- Why Does a High Gloss Tumble Finish Hide the Same Defects That Ruin a Cabochon Later?
- How to Tumble Stones Without Over-Rounding Edges Using a 3-Stage Cycle Plan
- Tumbled Stones vs Rough: Which Is Better if You Need a Matching Pair Under £30?
- The Tumbling Mistake That Frosts Softer Stones After Just One Weekend
- When Should You Stop Tumbling and Hand-Finish to Avoid Orange Peel and Bruising?
- Why Can a Stone Look Shiny but Still Have a Poor Polish That Dulls in Weeks?
- £50 Tool Kit vs £200 Tool Kit: Which Non-Destructive Tools Actually Change Your Accuracy?
- Which Non-Destructive Tests Give You the Most Certainty Before You Lose the Return Window?
Why Does a High Gloss Tumble Finish Hide the Same Defects That Ruin a Cabochon Later?
A high-gloss tumble finish can make defects difficult to notice because the curved surface produces moving, concentrated reflections that compete with faint internal features. Tumbling smooths the exterior without removing deeper fractures. Cutting or flat-lapping exposes a different surface, potentially revealing fissures, inclusions and cloudy zones that were previously hidden or difficult to see.
The distinction begins with how light interacts with the surface. A smooth curved stone reflects incident light in different directions across its changing contours. A bright highlight may conceal a faint line beneath it, particularly when the material is opaque or strongly patterned.
A polished flat face produces a more consistent reflection across the inspected area. Under suitable lighting, differences in surface texture and internal structure may become easier to compare. However, flat faces can also generate glare, and neither geometry guarantees that a fracture will be visible.
Consider how the same stone might appear before and after cutting:
| Feature | Rounded tumble finish | Newly polished flat face |
|---|---|---|
| Fine fissure | May disappear beneath reflections or patterns | May appear as a continuous line where the cut intersects it |
| Subsurface bruising | Can be difficult to distinguish from natural cloudiness | May become more noticeable as a pale or hazy zone |
| Colour variation | Visible mainly through the existing exterior | Reveals colour distribution along the new cut plane |
| Soft inclusion | May remain concealed below the polished skin | Can become exposed and polish differently from the host mineral |
Before buying, move a small phone torch slowly across the stone at a shallow angle. Watch for interrupted highlights, pits, scratches and lines that remain in the same physical position as the light moves. Then inspect from another direction and, where the stone transmits light, illuminate it from behind.
The International Gem Society‘s 10x loupe examination guide describes how directed and transmitted illumination help reveal different surface and internal features. This is a useful inspection principle, although it does not establish that rounded stones systematically conceal fractures.
Another complication is treatment. The Gemological Institute of America explains that fracture fillings and coatings can change how features appear. An apparently clean surface therefore does not prove the absence of internal damage.
Polish is evidence of surface finishing, not structural integrity. A fine polish affects the exposed surface, whereas cutting can reveal weaknesses deeper inside the stone.
If the material passes an initial visual inspection, the next challenge is preserving its useful shape while finishing it.
How to Tumble Stones Without Over-Rounding Edges Using a 3-Stage Cycle Plan
To limit over-rounding, organise tumbling around three controlled abrasive stages: coarse shaping, medium refinement and fine smoothing, followed by a separate polish when needed. Inspect the stone after each stage rather than relying on a fixed number of days. Move forward when the required scratches are removed and the intended geometry is preserved.
Over-rounding occurs because exposed corners and protrusions experience repeated abrasive contact. A stone that needs only surface refinement can lose important edges if left in coarse grit long after its major defects have disappeared.
Once an edge has been ground away, later polishing cannot restore it. This matters when preparing stones for paired jewellery, cabochons with defined outlines or specimens where natural geometry is part of their appeal.
A three-stage control plan helps separate necessary material removal from unnecessary reshaping.
| Stage | Main purpose | Decision before advancing |
|---|---|---|
| 1. Coarse | Remove unwanted projections and substantial surface defects | Stop when the minimum required shaping is complete |
| 2. Medium | Replace coarse scratches with a finer, more uniform surface | Check for remaining coarse scratches under magnification |
| 3. Fine | Prepare a consistent surface for final polishing | Confirm the shape is stable and no obvious earlier-stage scratches remain |
This is a three-stage abrasive plan, not a claim that three stages always produce a finished gloss. Conventional tumbling commonly uses four stages when final polishing is counted separately. Some materials require additional refinement or different abrasives.
Photograph one reference stone against a ruler before processing and at each inspection. Use the same orientation and lighting. Compare its outline, dimensions and remaining scratches. A visible reduction in a feature you wanted to preserve is a reason to reconsider the process.
Material hardness, barrel loading, media and abrasive condition all influence results. A cycle suitable for quartz-rich stones should not automatically be applied to softer minerals. A uniform appearance under magnification is more informative than elapsed time alone.
Clean stones, barrel and media thoroughly between grit stages. Coarse abrasive carried into a finer stage can introduce new scratches and undermine the work already completed.
Shape control also affects purchasing decisions: when two stones must match, the amount of material available for reshaping becomes as important as their initial appearance.
Tumbled Stones vs Rough: Which Is Better if You Need a Matching Pair Under £30?
For a matching pair under £30, tumbled stones are generally the more practical option when you need immediately usable pieces and have no cutting equipment. Rough material offers greater control over symmetry and pattern placement, especially when both pieces come from one specimen, but cutting costs and the risk of hidden defects can outweigh the apparent savings.
Two stones from the same mineral category are not necessarily a matched pair. Their colour saturation, translucency, pattern orientation, size and outline can differ even when both have an excellent polish.
Rough material allows a lapidary worker to plan two pieces from one larger specimen. This can improve consistency, but shared origin does not guarantee matching colour or pattern. Internal zoning, veins and fractures may differ across adjacent cuts.
Tumbled stones avoid much of the preparation work, yet their shapes have already been influenced by abrasion. Correcting asymmetry may require additional grinding, potentially removing the finish you paid for.
| Decision factor | Tumbled stones | Rough stone |
|---|---|---|
| Immediate usability | Usually higher | Requires preparation |
| Shape control | Limited by existing contours | Greater with suitable equipment |
| Pattern continuity | Uncertain unless provenance is established | Can be planned from one specimen |
| Hidden defects | May be obscured by finish | May remain concealed until cutting |
| Equipment requirement | Low for simple mounting | Potentially substantial |
Before purchasing a tumbled pair, compare both stones under the same neutral lighting. Rotate them together rather than assessing one at a time. Check colour first, then backlight translucent pieces and finally compare their outlines from the intended viewing direction.
Shape symmetry deserves particular attention. Two stones can appear similar when loose but look noticeably different once placed in matching earrings or adjacent settings.
Ask the seller whether the pieces were selected from one batch, cut from the same specimen or simply grouped because they share a material name. These descriptions establish different levels of confidence.
The £30 threshold is a spending constraint, not a guarantee of availability or professional grading. Include delivery, mounting requirements and any necessary finishing supplies when comparing options.
Even a visually convincing pair can be damaged during later finishing if the stones respond differently to abrasion.
The Tumbling Mistake That Frosts Softer Stones After Just One Weekend
Mixing substantially different mineral hardnesses in one tumbler can leave softer stones scratched, matte or frosted while harder pieces remain glossy. The harder material can abrade softer surfaces during repeated contact. Damage may become apparent within a short run, but its timing depends on the minerals, abrasive, loading conditions and tumbler.
Mohs hardness describes resistance to scratching. It does not measure every aspect of durability, particularly resistance to fracture or impact. Nevertheless, it is an important consideration when deciding which stones can share a tumbling batch.
According to RockTumbler.com‘s Mohs hardness guide for tumbling, common materials differ considerably: agate is approximately Mohs 7, obsidian approximately 5–6, fluorite 4 and calcite 3.
A mixed batch containing agate and calcite therefore presents a different abrasion problem from a batch of similarly hard quartz-rich stones. Soft minerals can lose their finish or shape before harder stones have reached the desired condition.
Adding more polishing compound is not a reliable solution. If the surface has been scratched or mechanically damaged, additional polish may leave those defects intact. The damaged surface may need controlled regrinding before another finishing attempt.
Sort stones by known mineral identity and broadly compatible hardness before loading the barrel. Unknown specimens deserve separate treatment until their properties are better understood. A steel blade or quartz reference may help with a controlled hardness comparison, but a scratch test is potentially destructive and should be reserved for expendable samples or inconspicuous areas with permission.
Fluorite, calcite and gypsum varieties such as selenite require particular caution. Their softness, cleavage or other physical characteristics can make conventional mixed-stone tumbling unsuitable. Even stones with similar hardness may be incompatible if their toughness differs substantially.
Clean equipment between batches as carefully as between abrasive stages. Residual coarse grit can continue scratching surfaces after the operator believes the process has advanced to fine polishing.
If a stone has already developed an uneven surface, the next decision is whether continued tumbling will improve it or make the damage worse.
When Should You Stop Tumbling and Hand-Finish to Avoid Orange Peel and Bruising?
Stop machine tumbling when the intended shape is achieved but the surface begins developing pits, uneven texture or impact-related cloudiness. Continued processing may enlarge these defects rather than improve the finish. Hand-finishing offers more local control, although existing damage may require returning to an earlier abrasive stage before polishing can succeed.
Orange peel describes a polished surface with a subtly pitted or uneven texture resembling citrus skin. It is a diagnostic description, not proof of one universal cause. Material differences, finishing technique and prolonged polishing can all warrant investigation.
Bruising is another concern. In lapidary work, the term can describe impact-related damage that produces cloudy or whitish areas beneath or near the surface. However, pale patches may also arise from inclusions, natural mineral structure or incomplete polishing. Appearance alone cannot establish their cause.
The Bath Geological Society Journal article on rock specimen polishing describes orange peel as a polished but pitted finish and warns that abrasive contamination can produce repeated scratches. Its discussion concerns manual specimen polishing, so its observations should not be treated as a universal explanation of rotary tumbling defects.
Inspect the stone dry under a 10x loupe after the fine abrasive stage. If the shape is correct and the remaining scratches are consistent and fine, consider a controlled hand-finishing trial on a small area. Use an abrasive and backing material appropriate to the mineral, with suitable dust suppression and protective equipment.
Hand-finishing is not automatically better. Uneven pressure can create flats on rounded stones, and unsuitable polishing pads can affect softer or porous materials. The advantage is the ability to inspect and adjust a small area before treating the entire specimen.
If orange peel is already present, determine whether the irregularity is shallow enough to remove without compromising the desired shape. Returning to an earlier grit may be necessary, but that means removing more material. Deep pits, fractures and extensive bruising may be uneconomical or impossible to eliminate completely.
A successful correction should produce a stable finish, not merely a temporary shine that disappears after handling.
Why Can a Stone Look Shiny but Still Have a Poor Polish That Dulls in Weeks?
A stone can appear glossy without having a durable mechanical polish because surface coatings, oils or fine scratches can alter its initial reflections. Some treatments temporarily improve appearance, while residual scratches scatter light under close inspection. However, not every stone that becomes dull has a defective polish, and the rate of change cannot be predicted from shine alone.
Three different surface conditions can produce an attractive initial appearance:
- True mechanical polish: sufficiently refined surface texture creates consistent reflections without depending on an applied gloss-enhancing layer.
- Wax, oil or other coating: material on or within the surface can change its apparent smoothness, colour or transparency.
- Incomplete or burnished finish: a surface may show strong highlights while retaining fine scratches or unevenly finished areas.
Skipping abrasive stages can leave scratches from earlier processing. Fine polishing compound does not necessarily remove them because it may lack the cutting action required to level the surrounding surface.
Examine the stone under angled illumination and magnification. Rotate it slowly, looking for directional scratch patterns, dull patches or a finish that varies across the surface. Inspecting a clean, dry stone helps avoid mistaking fingerprints or residue for permanent surface damage.
Cleaning tests require caution. Warm water with a little mild soap may be appropriate for some durable, untreated stones, but porous, water-sensitive or treated minerals may be damaged. Isopropyl alcohol is not a universal safe test: it can affect certain dyes, coatings and treatments, and a burnished surface will not necessarily lose its gloss when wiped.
The Gemological Institute of America’s guidance on gemstone treatments explains that coatings and fracture fillings can change appearance and that some treatments have durability limitations. This supports asking sellers about treatments, not assuming every shiny tumbled stone has been coated.
For stones intended for frequent handling, request disclosure of known treatments and ask whether the finish was produced mechanically or enhanced afterwards. A seller’s answer is useful purchasing information, although it does not replace independent examination.
Once the inspection questions are clear, it becomes easier to decide which tools deserve space in a small collector’s kit.
£50 Tool Kit vs £200 Tool Kit: Which Non-Destructive Tools Actually Change Your Accuracy?
A £50 inspection kit can be more useful than a £200 collection of instruments if it contains a good 10x loupe, suitable lighting and a reliable scale. More expensive equipment improves decisions only when it answers a specific unresolved question. Neither budget guarantees accurate mineral identification, treatment detection or confirmation of geographic origin.
Begin by distinguishing observations from identification. A loupe can reveal scratches, pits, inclusions and accessible fractures. A scale provides mass measurements. UV illumination may reveal fluorescence. None of these observations independently proves that a stone belongs to a particular mineral species.
For an illustrative purchasing framework, the two budgets can be compared by function rather than by unverified market prices.
| Inspection need | £50 kit priority | £200 kit consideration |
|---|---|---|
| Surface inspection | 10x loupe and directed light | Improved lighting or magnification if needed |
| Mass comparison | Digital scale with appropriate resolution | Calibrated equipment for repeatable measurements |
| Translucency | Small white-light torch | More controlled transmitted-light setup |
| Fluorescence | Optional UV torch with eye protection | More controlled UV observation where justified |
| Optical identification | Usually outside the essential starter kit | Suitable refractometer if the stones and user’s training justify it |
These are spending priorities, not verified equipment bundles or price quotations. Availability and suitability vary by market and instrument quality.
A refractometer can provide valuable identification evidence for suitable polished surfaces, but curved, opaque or otherwise unsuitable specimens may limit its usefulness. Accurate readings also require correct technique and, with some instruments, appropriate contact liquid.
Hardness testing presents another distinction. It can help narrow material possibilities, but scratching a finished stone is not genuinely non-destructive. Reference specimens and testing on expendable material are safer alternatives when preservation matters.
UV fluorescence may suggest avenues for investigation, yet many natural and treated materials overlap in their reactions. A UV response alone does not reliably establish dye, treatment or authenticity.
Buy instruments to resolve recurring decisions, not to accumulate measurements. A clear photograph of a fracture may be more useful for a return request than an ambiguous reading from an unfamiliar instrument.
The most effective kit is the one that supports a repeatable inspection before the seller’s return deadline.
Key takeaways before the final inspection
- Prioritise observations that could justify accepting, questioning or returning the stone.
- Keep tests non-destructive unless the seller has explicitly authorised another method.
- Record defects immediately; long-term coating durability and internal quality may remain uncertain.
Which Non-Destructive Tests Give You the Most Certainty Before You Lose the Return Window?
The most useful pre-return checks are a documented visual inspection, examination with a 10x loupe, transmitted-light inspection where appropriate, and comparison with the seller’s stated dimensions and weight. UV observation can provide supplementary evidence. Avoid scratch tests, solvents and cutting unless permitted, because they may damage the stone or affect return eligibility.
Start with the seller’s description. Record the stated material, size, colour, treatments, quantity and return conditions. Then examine the delivered stone under consistent lighting before making any irreversible changes.
Surface inspection should come first because it is fast and can identify obvious reasons for a return: unexpected cracks, chips, pits, poor finishing or a mismatch with the advertised photographs.
Next, use backlighting on translucent stones to look for features that are less apparent under reflected light. An opaque specimen may reveal little or nothing through transmitted illumination; that limitation should not be mistaken for evidence of poor quality.
Measure mass and dimensions only where they are relevant to the listing. A difference may justify asking the seller for clarification, but weight alone cannot authenticate a mineral because density, inclusions and specimen dimensions vary.
UV inspection can be useful if the mineral’s fluorescence is relevant to a specific question. Its absence or presence is not a conclusive identification test, and UV equipment should be used with appropriate eye and skin precautions.
Five checks to complete on delivery day
- Save the listing and return terms. Keep a dated copy showing the material description, photographs, measurements and deadline.
- Photograph the stone under ordinary light. Capture its overall appearance and each side, creating a baseline image record.
- Inspect with grazing light and a 10x loupe. Record close-up photographs or written locations of any scratches, pits, chips or suspected fractures.
- Compare specifications and inspect translucency. Record measurements where appropriate and note what backlighting does or does not reveal.
- Make an accept-or-query decision. Prepare a short evidence summary identifying any discrepancy and contact the seller within the applicable return period.
These checks aim to eliminate obvious problems rather than deliver full authentication. A stone can pass every external inspection and still contain an internal fracture that becomes visible only after cutting.
Distinguish urgent checks from longer-term observations. Misdescribed material, visible damage and incorrect dimensions should be documented during the protected purchasing period. Gradual coating wear or changes after extended handling may not be detectable on delivery.
Do not assume that every retailer offers the same return rights or that modified stones remain eligible. The applicable terms and consumer protections depend on the seller, location and transaction. Confirm them before grinding, drilling or applying cleaning chemicals.
Before the return deadline, keep the stone unmodified, save the inspection evidence and request clarification or a return where the findings justify it. A polished appearance should be the beginning of an assessment, never its only conclusion.
Can a tumbled stone contain fractures even if no cracks are visible?
Yes. Internal fractures may not intersect the exposed surface, and opaque material can prevent light from revealing deeper features. A clean-looking exterior cannot guarantee that cutting will expose flawless material.
Does a 10x loupe show every internal defect?
No. A 10x loupe improves visibility of accessible surface features and some inclusions, especially with suitable lighting. Its effectiveness depends on transparency, feature size, viewing angle and the material itself.
Should a polished stone be scratched to confirm its hardness?
Not when preserving its finish or return eligibility matters. Scratch testing can permanently mark the surface. Use known reference samples or request documented identification from the seller instead.
Can a cloudy interior become glossy after more tumbling?
Additional tumbling may improve an inadequately finished exterior, but it cannot reliably remove cloudiness caused by internal inclusions, fractures or mineral structure. Identifying the source of the cloudiness is essential before removing more material.
Is a naturally glossy stone necessarily more valuable than a dull one?
No. Value and suitability depend on mineral identity, condition, rarity, appearance, intended use and other factors. A dull rough specimen may offer better cutting potential than a glossy tumbled stone with extensive internal damage.