Mechanical rock breaking, drilling, and blasting are excavation methods worth particular scrutiny when buying rough gemstones for cutting. Their impact and vibration can damage crystals, even when the exterior remains attractive. However, no reliable comparative evidence establishes one method as universally responsible for the most hidden fractures. The mineral, its geological history, its position in the deposit, and its subsequent handling all matter.
For cutters, the problem often becomes apparent after considerable work. A rough stone that appears transparent may reveal reflective fracture planes, cloudy zones, or structural weaknesses once a surface has been ground and prepolished. The damage may predate extraction, occur during mining, or arise during later handling and cutting.
The practical response is not to reject every mechanically recovered crystal. It is to evaluate excavation history alongside internal condition, estimate usable cutting yield, and decide how much uncertainty a particular project can tolerate. A modestly priced stone requiring trimming may be worthwhile for cabochons, while the same fracture risk could undermine an ambitious faceting project.
Hidden fractures in rough gemstones: the essentials
- Highest-priority excavation risks: drilling, blasting, crushing, and forceful mechanical extraction can damage crystals, although no universal risk ranking is established.
- Best purchasing precaution: examine suitable rough under changing illumination angles, assess any visible fractures, and plan a small test window before major cutting work.
- Best source for predictable projects: carefully recovered pocket material may reduce extraction-related damage, but geological fractures and handling damage remain possible.
- Why Does Mechanical Digging Create « Invisible » Weakness That Shows Up at Prepolish?
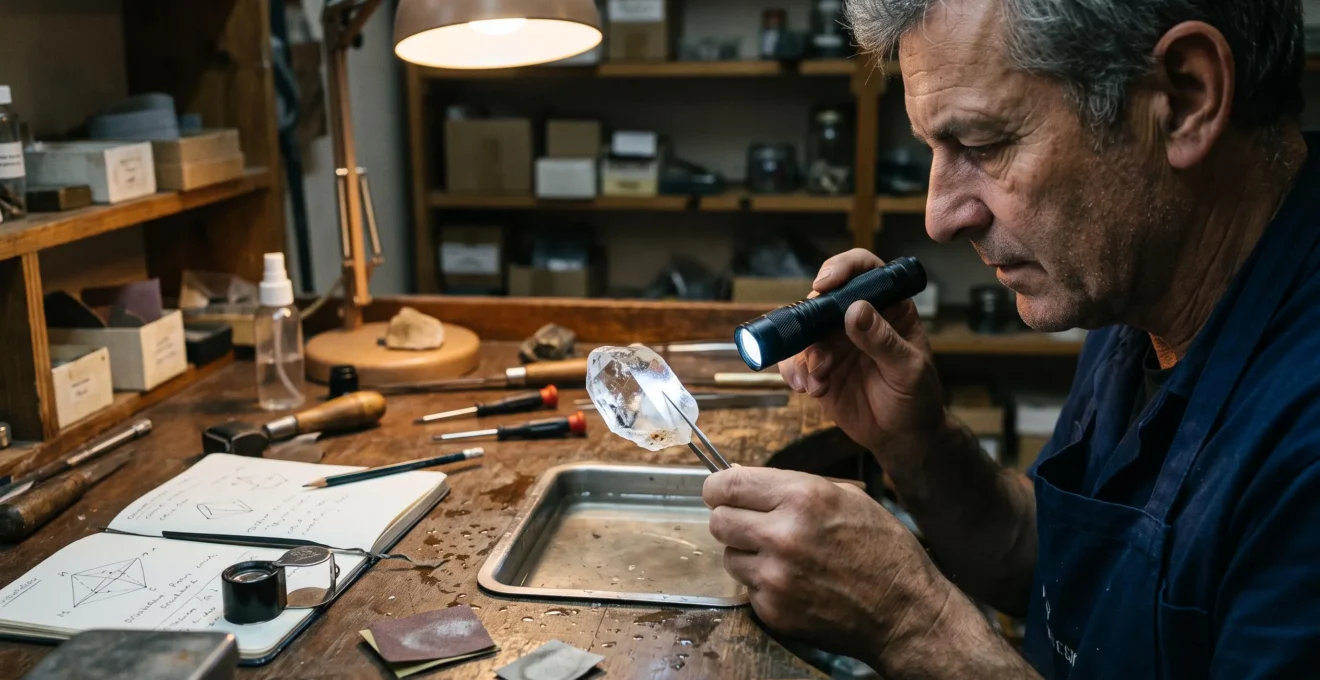
- How to Screen Rough for Shock Damage Using a Torch, Water, and 2 Viewing Angles?
- Blast-Adjacent Rough vs Hand-Extracted Pockets: Which Is Better for Faceting Yield?
- The Misread That Makes People Call Tool Bruising « Natural Texture » and Overpay
- In What Order Should You Trim, Stabilise, and Test-Cut Suspect Rough to Avoid Wasting Hours?
- Crystal Points vs Waterworn Pebbles: Which Rough Is Easier for Your First Cabochon?
- Primary Rock Deposit vs Alluvial Deposit: Which Origin Tends to Give Better Crystal Shape?
- Which Deposit Type Produces Cleaner Stones, and Which One Produces Bigger Ones With More Inclusions?
Why Does Mechanical Digging Create « Invisible » Weakness That Shows Up at Prepolish?
Mechanical digging can introduce or extend fractures when tools strike rock, heavy equipment breaks surrounding matrix, or vibrations reach crystals near the excavation zone. Some damage remains difficult to recognise through rough surfaces and becomes conspicuous after grinding and prepolishing. Yet a fracture discovered at prepolish is not proof of mechanical damage: natural weaknesses can produce similar observations.
A crystal does not have to be hit directly to experience stress. Force applied to its surrounding host rock may reach the crystal through contact points or through the matrix itself. Existing weaknesses can become paths along which fractures propagate. Consequently, a crystal with apparently intact faces, surrounded by heavily shattered host rock, deserves careful inspection.
The Gemological Institute of America discusses these risks in GIA’s article on gem-bearing granitic pegmatites. The article explains that drilling, blasting, and breaking pegmatite rock can damage valuable crystals and influence mining decisions. It also describes the careful hand recovery of crystals from discovered pockets.
Cleavage and shock damage require different interpretations. Cleavage is a crystallographically controlled tendency to split along specific planes. An impact may exploit those planes, producing a fracture whose orientation reflects the mineral’s structure. Other fractures may look irregular or cross-cutting, but irregularity alone cannot identify machinery as their cause.
This distinction matters because crystals can fracture naturally during geological deformation, weathering, or movement within a pocket. Some may already be broken before miners reach them. The location and appearance of a fracture provide clues, not a definitive timeline.
At prepolish, smoother surfaces reduce some of the optical interference caused by the rough exterior. Previously overlooked fracture boundaries may appear as bright flashes, whitish reflections, or fine lines under suitable lighting. Not every white mark is a fracture, however: scratches, inclusions, and polishing defects can also interfere with observation.
Price should reflect uncertainty rather than an assumed excavation label. Mechanically recovered rough may be offered at a discount when buyers recognise increased breakage risk, but there is no established rule that it is always cheaper. Compare the price against the realistically usable portion of the specimen, not its total weight.
The immediate next step is to examine the interior from more than one direction. Even a simple lighting test can reveal weaknesses that a quick surface inspection misses.
How to Screen Rough for Shock Damage Using a Torch, Water, and 2 Viewing Angles?
Screen translucent rough by examining it with a strong torch from two substantially different directions, rotating the specimen and watching for internal reflective planes or shadow lines. Wetting or partial immersion can sometimes improve visibility, provided the material tolerates water. This is a practical preliminary screen, not a validated method for diagnosing excavation damage or guaranteeing an internally clean stone.
Begin with the mineral identification and its sensitivity to moisture. Ordinary water is not suitable for every rough gemstone, particularly materials that are porous, water-sensitive, or associated with unstable matrix. Use dry illumination where water compatibility is uncertain.
For water-compatible material, a practical screening sequence is:
- Inspect the dry exterior. Identify crystal faces, contact zones, visible cracks, cloudy areas, and possible cutting orientations.
- Wet the surface lightly. If safe for the material, clean water may reduce some distracting surface scattering. Observe whether the interior becomes easier to assess.
- Illuminate from the first angle. Direct a bright torch through a suitable edge or side of the specimen and look for reflective planes, internal lines, or abrupt changes in transparency.
- Rotate and illuminate from a second angle. Examine the opposite or a substantially different direction. Tilt the rough further if an apparent feature appears or disappears.
- Record the observations. Note the suspected fracture’s position relative to the stone you intend to cut.
Why change angles? In GIA’s technical paper on gem photomicrography, gemologist John I. Koivula demonstrates that fracture visibility can depend strongly on the viewing and illumination geometry. A feature apparent at one angle can become difficult to see after a small change in orientation.
The paper also explains how suitable refractive-index liquids can reduce surface interference. Water, however, is not optically equivalent to specialised immersion liquids, and its effectiveness varies with the gemstone. Wet examination should therefore complement, rather than replace, dry inspection.
Translate the observations into a buying decision using three working grades:
| Grade | Observation | Buying response |
|---|---|---|
| Clean-looking | No significant internal fracture detected under the available examination conditions. | Consider for the intended cut, retaining an allowance for unseen defects. |
| Suspected but workable | A possible fracture appears outside the planned finished stone. | Purchase only if trimming still leaves acceptable size and value. |
| Confirmed damaged | A clear open fracture or damaged zone crosses essential cutting material. | Reject for the intended high-clarity cut, or value as smaller, treated, or alternative material. |
The most important limitation is orientation. A fracture nearly parallel to the light path may be difficult to recognise, and opaque material cannot be evaluated through transmission in the same way. The two-angle method has no established detection rate.
Use a clean-looking result to reduce uncertainty, not erase it. The same caution becomes especially important when comparing low-priced blast-adjacent rough with carefully recovered pocket crystals.
Blast-Adjacent Rough vs Hand-Extracted Pockets: Which Is Better for Faceting Yield?
Carefully hand-extracted pocket rough is often the more conservative choice for faceters seeking predictable projects, because recovery can avoid some of the direct mechanical stresses associated with breaking hard rock. Blast-adjacent material may still be sound and financially attractive. The better purchase is whichever source delivers more usable finished-stone value for the amount paid, not necessarily the lower price per gram.
In pegmatite mining, careful hand recovery becomes possible once a crystal-bearing pocket is located and exposed. This can limit additional damage during final removal. Nevertheless, pocket crystals may contain natural fractures, contact damage, or broken sections that formed long before excavation.
Blast-adjacent rough presents a different uncertainty. Its condition depends on factors including proximity to the disturbed zone, protection from surrounding rock, subsequent handling, and pre-existing crystal integrity. A specimen described as coming from a blasting operation should not automatically be classified as fractured.
For buying decisions, distinguish rough purchased from usable finished material. A low acquisition cost becomes less attractive if repeated trimming, discarded preforms, or unsuccessful cuts consume the apparent savings.
The following comparison concerns practical purchasing considerations, not measured recovery rates.
| Criterion | Blast-adjacent rough | Hand-extracted pocket rough |
|---|---|---|
| Extraction-related risk | Potential exposure to mechanical disturbance; individual condition varies. | Some extraction stresses can be reduced through careful recovery. |
| Existing geological defects | Possible regardless of recovery method. | Also possible, including fractures predating recovery. |
| Price | May be discounted when uncertainty or damage is recognised. | May command a premium for attractive or carefully recovered specimens. |
| Best buying approach | Screen individually and price according to usable volume. | Inspect carefully despite the recovery history. |
| Likely buyer fit | Cutters comfortable with trimming, losses, or experimental projects. | Cutters prioritising predictable orientation and lower extraction uncertainty. |
There is no controlled yield comparison in the supplied evidence that establishes a numerical advantage for either source. The choice should therefore be evaluated through the buyer’s own cutting records.
Hypothetical buying comparison: acquisition price versus usable yield
Imagine two rough parcels intended for similar stones. Parcel A costs one-third as much as Parcel B but comes from a mechanically disturbed area. Parcel B contains carefully recovered pocket crystals.
For each parcel, calculate the effective cost per acceptable finished stone by dividing the total acquisition and processing costs by the number of stones that meet the intended quality standard. Alternatively, divide total project cost by acceptable finished carat weight when finished weight is the relevant objective.
Parcel A only represents better value if its lower purchase price outweighs any additional cutting losses, processing time, and treatment costs. The outcome cannot be determined from price alone.
When evaluating a lot, ask for its recovery history and examine representative pieces. Material recovered well away from the most heavily disturbed area may warrant a different assessment from crystals found directly within broken or crushed rock.
For buyers unwilling to stabilise fractures or abandon partially cut stones, careful recovery history deserves significant weight. For experimental cutters, uncertain rough may still offer value if the purchase price and expected losses are acceptable.
The Misread That Makes People Call Tool Bruising « Natural Texture » and Overpay
The costly mistake is treating every irregular crystal surface as natural growth or harmless geological texture. A localised crushed contact zone may indicate impact or pressure damage, while repeated geometric patterns may reflect crystal growth or natural etching. These are useful distinctions, but surface appearance alone cannot conclusively establish whether damage occurred during excavation.
Start by examining how the marks relate to the crystal’s structure. Growth features may repeat across related faces or follow a consistent crystallographic pattern. Etching may also create characteristic surface relief, depending on the mineral and its chemical history.
Suspected bruising, by contrast, may occupy a concentrated contact region with crushed edges, small intersecting cracks, or an irregular cluster of disturbed surfaces. Such observations justify further examination, especially where the crystal appears to have rested against hard matrix or contacted an extraction tool.
Inspect several faces rather than magnifying one suspicious spot. Repeated contact-like marks around the base, attachment zone, or opposing surfaces can help identify where external forces may have acted. However, apparent contact patterns do not reveal the precise event that produced them.
Use a low-angle desk lamp to inspect surface relief and reflective differences. Changes in lustre, fresh-looking broken edges, or finely crushed zones may support suspicion of physical damage. They are not reliable standalone methods for dating fractures, because geological alteration and subsequent handling can produce complicated surface histories.
Old healed fractures are another source of confusion. A crystal may fracture naturally and subsequently heal through geological processes. Such features are not equivalent to an open crack created during extraction, although they can still affect appearance or cutting plans.
A buyer should also separate mineral specimen value from cutting value. A textured crystal can be an interesting collector’s specimen while offering poor yield for faceting. Conversely, a damaged termination may be irrelevant if a clean interior can be recovered for a smaller stone.
The financial mistake occurs when attractive descriptions such as natural character are accepted as proof of intact condition. Ask whether the advertised quality depends on undamaged faces, structural soundness, or merely appearance, and examine accordingly.
When the evidence remains ambiguous, price the piece conservatively and move to an inexpensive cutting test before investing substantial time in shaping or stabilisation.
In What Order Should You Trim, Stabilise, and Test-Cut Suspect Rough to Avoid Wasting Hours?
For suspect but potentially workable rough, establish the cutting orientation first, remove clearly unusable material through controlled trimming, and evaluate a small test window before committing to full preforming. Stabilisation should generally follow a decision that the remaining material is worth processing. This sequence is a practical risk-management approach, not a universal treatment protocol for every mineral.
Begin with the intended finished shape. Mark the expected table, outline, or cabochon face and identify where visible fractures intersect the plan. A flaw outside the finished stone may be removable; one crossing the essential central volume may make the project uneconomic.
Trim only when doing so is appropriate for the material. Cleavage-prone or fragile stones may fracture further under unsuitable sawing, grinding, or handling. Use controlled cutting methods and the water or cooling arrangements appropriate to the mineral and equipment.
Once a suspect area is accessible, a small test-cut window can reveal how the material behaves under an initial finishing operation. Create a limited flat or curved inspection area where the cut is relevant to the intended design. Progress through suitable abrasives and prepolish that area while looking for fracture reflections, opening cracks, or unexpected chipping.
Testing before stabilisation helps avoid unnecessary treatment of material that would otherwise be rejected. Yet there are exceptions. Some fragile materials require support or specialised handling before any safe cutting operation. Stabilisation may also change optical appearance, durability, and disclosure obligations in the finished-stone market.
Do not assume that resin or fracture filling makes every compromised crystal suitable for faceting. The treatment must be compatible with the mineral, planned cutting method, and intended final use. Where compatibility is unknown, seek material-specific advice rather than experimenting on a valuable specimen.
Five actions before committing to suspect rough
- Record the source. Create a label identifying the supplier, claimed deposit origin, and known extraction method; leave unknown fields explicitly marked as unknown.
- Map the defects. Mark observed fracture locations on a photograph or orientation sketch, producing a visible cutting-risk map.
- Plan the trim. Draw the proposed finished-stone outline and identify which damaged regions can be excluded, producing a preliminary yield plan.
- Evaluate a small test window. Where the mineral permits, prepare and prepolish a limited area, then record whether cracks, chips, or reflective planes appear.
- Make a treatment decision. Write down whether to proceed untreated, investigate compatible stabilisation, redesign the cut, or reject the piece, with a reason for the choice.
Keep the observations alongside the finished result. Over successive projects, those records can show whether particular suppliers, material types, or recovery histories consistently fit your requirements. This personal evidence will be more useful than assuming every stone from a named excavation method behaves alike.
For a beginner, the simplest way to reduce such decisions may be to change the type of rough purchased. Waterworn pebbles and extracted crystal points create different opportunities and constraints.
Crystal Points vs Waterworn Pebbles: Which Rough Is Easier for Your First Cabochon?
Waterworn pebbles are often a practical starting choice for a first cabochon because their rounded outlines can suit simple designs, and natural transport may have removed some mechanically weak material. They are not necessarily free of fractures, however. Mineral hardness, toughness, cleavage, size, and visibility of defects can matter more than whether the rough is a pebble or a crystal point.
River transport subjects stones to repeated movement and abrasion. Weak fragments may break apart, while surviving material continues downstream and becomes progressively worn. This creates a form of natural mechanical selection, although its effectiveness varies with the deposit and individual stone.
As explained in GIA’s review of gemstones from sedimentary deposits, transport can abrade and round gemstone-bearing particles while removing some fractured or otherwise poor-quality crystals. The surviving material can consequently be better suited to certain gem uses, but individual specimens still require inspection.
A rounded pebble frequently suggests a compact cabochon outline without extensive corner removal. For a novice, this can make orientation and material conservation more manageable. However, the available dimensions may limit the size, dome height, or symmetry of the finished piece.
Crystal points offer different advantages. An intact crystal may provide a longer starting shape, clear faces for orientation, and opportunities to select a cut that makes use of its geometry. Those advantages can be offset by hidden fractures, mineral cleavage, or flaws near the attachment zone.
Inspect the base of every extracted crystal point. The attachment area may contain natural contact irregularities, existing fractures, or extraction-related damage. A clean termination does not establish that the opposite end is sound.
Before buying your first cabochon rough, consider one practical question: would losing the planned shape after several hours of grinding be an acceptable learning expense?
If the answer is no, select inexpensive, well-inspected material of a suitable lapidary mineral and aim for a straightforward outline. If experimenting with shape and orientation is part of the appeal, crystal points may be worthwhile despite the added uncertainty.
The same balance becomes easier to understand when the geological deposit is considered: origin influences external form, but it does not provide a complete measure of internal condition.
Primary Rock Deposit vs Alluvial Deposit: Which Origin Tends to Give Better Crystal Shape?
Primary deposits generally offer better opportunities to recover crystals with recognisable growth faces and sharp terminations because the material has not undergone substantial transport away from its formation environment. Alluvial deposits commonly contain abraded, rounded, or fragmented material. Yet a pristine exterior does not guarantee internal integrity, and waterworn appearance does not automatically mean poor cutting quality.
In a primary deposit, gemstones remain within or near the geological environment where they formed. Some are embedded in solid host rock; others occur in cavities or pockets that allow crystal faces to develop with less physical obstruction.
Those conditions can preserve attractive geometric features. However, extraction may require breaking surrounding rock, which introduces a separate opportunity for mechanical damage. A sharp, apparently pristine crystal can therefore carry internal weaknesses despite having well-preserved growth faces.
Alluvial deposits form after weathering releases minerals from their original rock and water moves and sorts the resulting particles. Abrasion can modify surfaces, remove delicate edges, and round former crystal faces.
External preservation and internal soundness are different properties. A waterworn fragment may have lost its original shape yet survived considerable mechanical transport. Conversely, an angular crystal can retain impressive geometry while containing natural or extraction-related fractures.
Deposit origin should adjust the intensity of inspection rather than determine the verdict. For instance, a sharp termination on alleged strongly waterworn alluvial rough merits a question about the specimen’s transport history. Limited transport, recent release from source rock, or an inaccurate description may each be possible explanations.
Likewise, a rounded piece described as primary material is not necessarily mislabelled. Geological weathering, pocket movement, or previous breakage can modify crystal shape without requiring long-distance river transport.
Ask sellers how the origin was established and whether the material came from the original host rock, nearby weathered deposits, or a transported gravel concentration. Compare the explanation with the visible abrasion, associated matrix, and crystal form.
Once origin and excavation risk have been considered, the remaining question is how the deposit affects the size and clarity available for cutting, particularly when a larger crystal commands a substantial premium.
Key takeaways before choosing a deposit
- Separate three causes of uncertainty: geological inclusions, pre-existing fractures, and damage that may occur during extraction or processing.
- Judge size by usable volume: a large crystal with fractures crossing the intended cut may yield less valuable material than a smaller, cleaner piece.
- Match the purchase to the project: ask about geological origin and recovery history, then confirm that the remaining cutting risk fits your willingness to trim, redesign, or stabilise.
Which Deposit Type Produces Cleaner Stones, and Which One Produces Bigger Ones With More Inclusions?
No deposit type universally produces the cleanest gemstones or the largest crystals with the most inclusions. Crystal size and internal clarity depend on mineral species, growth conditions, geological events, and the deposit’s subsequent history. Some primary pegmatites can produce exceptionally large crystals, while alluvial transport may concentrate durable material that survived mechanical selection. Neither property alone predicts cutting quality.
Primary deposits offer access to crystals in their original geological setting. In certain pegmatites, mineral growth can generate exceptionally large specimens. However, crystal size does not establish freedom from inclusions, healed fractures, cleavage, or later mechanical damage.
Alluvial deposits introduce another selection process. Erosion and transport may destroy weaker material and concentrate minerals resistant to weathering and abrasion. The resulting gemstones can be suitable for cutting, but their size distribution, clarity, and condition depend on the source rocks and transport history.
Inclusions should not be confused with extraction fractures. Mineral crystals, trapped liquids, and gaseous cavities can form part of a gemstone’s geological history. Some fractures occur after crystallisation and later heal in the presence of geological fluids. These internal features cannot automatically be attributed to mining.
GIA’s scientific review of gemstone inclusions explains that crystals may fracture after formation and that some fracture systems subsequently heal. This geological history is important when judging internal features because a fracture-like pattern can be ancient rather than a consequence of recent excavation.
For purchase decisions, evaluate internal features according to their actual consequences. An inclusion may affect transparency, colour distribution, or aesthetic value without threatening the cutting process. An open fracture crossing a planned girdle or cabochon dome can raise a different concern about stability and material loss.
Large rough often creates an emotional buying trap: more grams appear to promise a more impressive finished stone. Instead, estimate the clean, correctly oriented volume remaining after necessary trimming. The apparent size advantage can disappear when flaws occupy the areas needed for the intended design.
Ask three questions before accepting a seller’s deposit-based description: Where did the mineral originally form? How was the rough recovered? What observable evidence supports the claimed usable clarity?
Answers should agree with the stone’s form and visible features, while recognising that appearance cannot establish every detail of origin. Where uncertainty remains, compare the purchase price with the smaller finished stones that could realistically be recovered.
For the next rough purchase, record the claimed deposit origin, recovery method, observed internal features, and intended finished-stone outline. Choose the specimen whose usable material and likely cutting effort suit your tolerance for trimming, stabilisation, and unexpected defects—not simply the one with the largest crystal or the most attractive exterior.
Can a rough gemstone contain fractures even when its exterior looks perfect?
Yes. Internal fractures may be difficult to observe through irregular surfaces or under unsuitable lighting. Rotating the stone, changing illumination direction, and examining an appropriately prepared surface can reveal previously overlooked features. An intact exterior does not guarantee a flawless interior, and any fracture discovered during cutting may have originated before extraction.
Does a hidden fracture appearing at prepolish prove that the stone was damaged by mining machinery?
No. Crystals can fracture during their geological history, during extraction and handling, or during cutting. Prepolish can make an existing feature easier to see without identifying its cause. Determining fracture origin may require additional mineralogical and contextual evidence, and in many cases the exact cause remains uncertain.
Should rough gemstones with visible fractures always be rejected?
Not necessarily. The decision depends on the fracture’s location, its effect on structural integrity, the intended cut, and the purchase price. Material unsuitable for a large transparent faceted stone may still yield smaller gems or serve another lapidary purpose. Treatment and stabilisation should only be considered where compatible with the material and final use.
Is water always safe for checking internal cracks in rough stones?
No. Water compatibility depends on the mineral, its porosity, associated matrix, and any existing treatment. Light wetting can sometimes improve visibility, but not all materials should be immersed or wetted. Where the identification or stability of the rough is uncertain, begin with dry inspection and obtain material-specific guidance before using liquids.
What information should a seller provide about the extraction history of rough gemstones?
Useful information includes the reported deposit type, whether the material came from host rock or a secondary concentration, and any known recovery method or treatment. A seller may not know every detail, especially when rough passes through intermediaries. Treat unknown history as uncertainty to incorporate into inspection and pricing rather than as automatic evidence of damage.